
Building a Table Saw Sled
Easy Table Saw Sled Build with T-Tracks
Discover how to quickly build a versatile table saw sled using t-tracks for secure wood positioning. Achieve consistent cuts with this essential woodworking tool. Perfect for any table saw enthusiast!
SMALL PROJECTSWORKSHOPS
Gary Goz
12/6/20245 min read
I had a table saw sled for my old Craftsman but I never built a new one when I got my Bosch so I finally got around to it.
I was inspired by Bourbon Moth's sled and mine is a variant from that.
This page will walk you through the build.
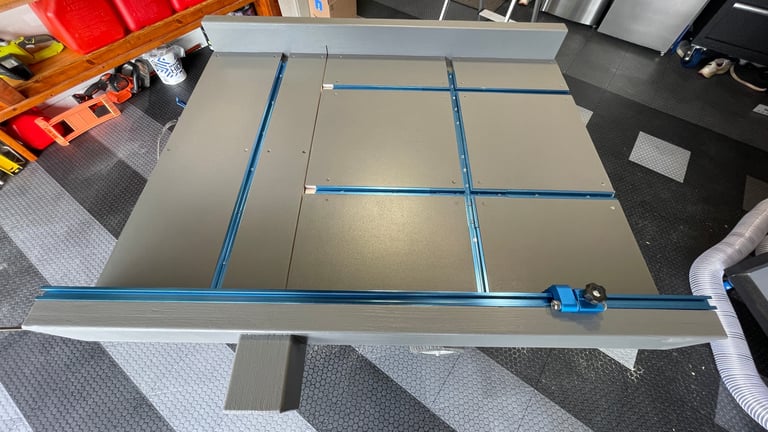

Before starting, I needed to decide what my key requirements were:
Big enough to fit a 24" board parallel to the saw
Needs to be able to be stored upside down on top of the table saw when not in use
Adjustable stop block for consistent cuts
Clamp locations to keep boards from shifting
Upgradeable if I want to add a dado stack
I also considered how I could cut miters, but decided that I could add that later with jigs that can be clamped to the sled
Requirements
Materials
I had a 4'x4' 1/2" MDF board sitting in the garage for almost 10 years. I decided that I was going to make that part of the build. It might not have been my first choice had I not had it because it made the sled heavier than I like. I'd recommend 3/4" plywood instead.
The only other items needed are 3/4" plywood (for the cross pieces), T-tracks and a 3' Multi-track.
Amazon Related Products


Cut the Base
Start with a base. This should be the size of the area that you want to eventually hold your cut piece plus 3" from front to back (accounts for the 2 cross pieces).
Mine is 36" x 28". This is the size of my table saw top and I'm going to have it sit exactly on top with the blade cut off center.
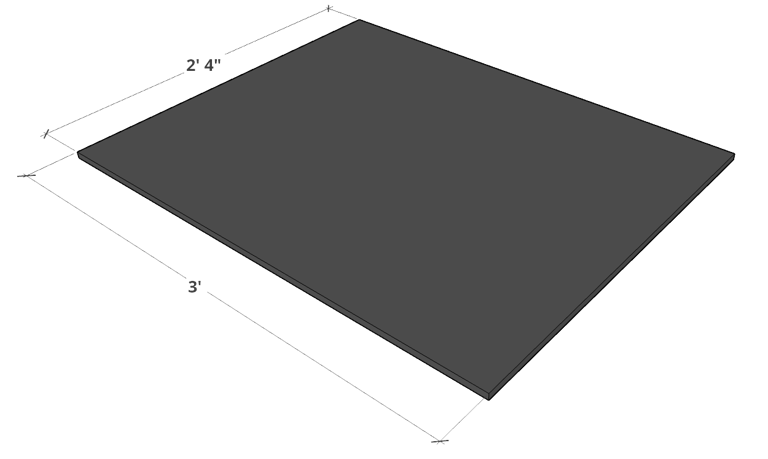

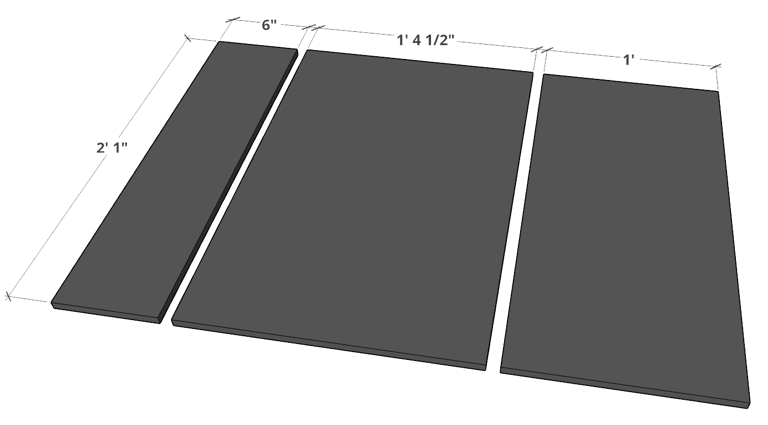
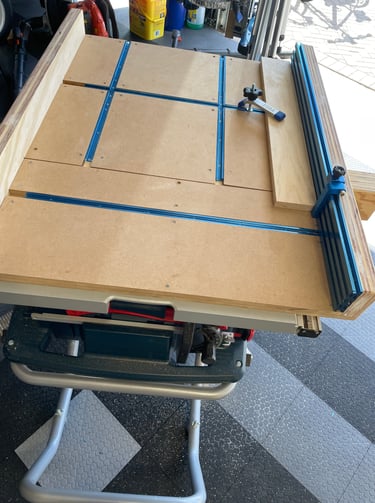
These cuts will depend on how you want to arrange your T-Tracks. On mine, I went with one long section to the left of the blade and 2 rows and one long section to the larger area to the right of the blade, which is probably overkill, but I had the extra T-Track so I used it up.
To make it easy (and keep it cheaper), I'm showing 2 vertical T-Tracks, but feel free to modify this.
Cut your Top Layer

Cut your Cross Pieces
Now you need cross pieces to hold it all together. I cut these the width of my sled and 3-1/2" tall using 3/4" plywood. You'll need 4. Glue together 2 pairs.
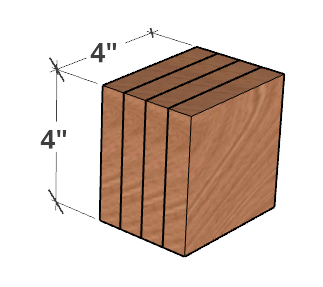
While your at it, cut four pieces of plywood at 4" x 4" and glue these all together into one block.
If it suits you, chamfer or round over the outer edges. But don't do this to the edges that meet the base or the multi-track.
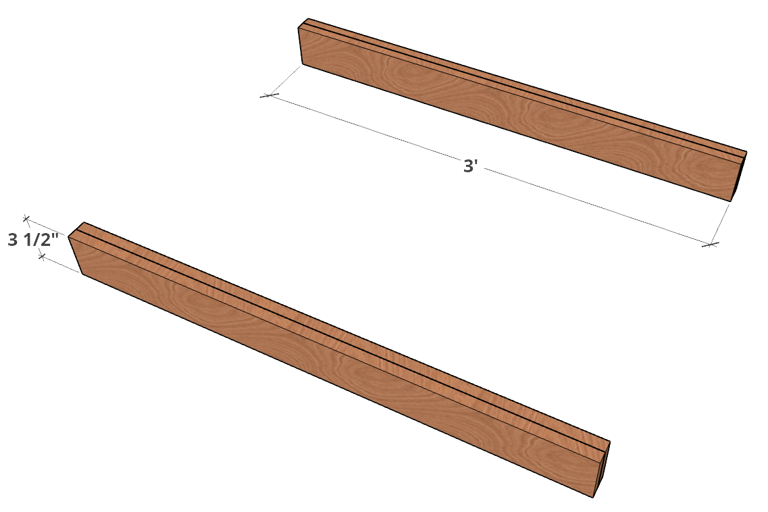


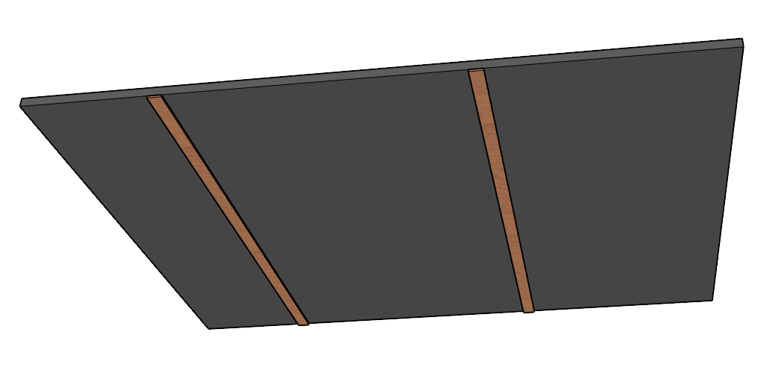
You'll need runners to keep the sled on the tracks. Cut a 3/8" strip from a 3/4" board. This can be from any 1x material (1x4, 1x6, etc.) Hardwoods are better, but I just used pine.
Cut your Runners

Attach the Runners
Spray the runners with something like a Loctite spray. This will allow them to stick to the base before you can get screws in them. Place pennies in the table saw tracks and put the runners on top of them in the track.
Move your table saw fence to the position that you want the edge of the sled to be positioned at.
Now, with one edge of the sled base against the edge of the fence, lower the base onto the runners and press firmly so they stick to the base.
Flip the base over and pre-drill using a countersink bit and then screw the runners to the base.
Test that the sled moves freely in the track. If it feels like its sticking, look for where the table is leaving marks on the runners and sand them down until there is no more friction.
Now test fit everything before assembly. You probably need to cut your T-Tracks. Cut them about 2" shorter than the space between the cross pieces. So if you're following the cuts above, these should be about 23". This space will allow you to slide in whatever you want to hook to the T-Track.
Cut T-Tracks and Test Fit

Assembly
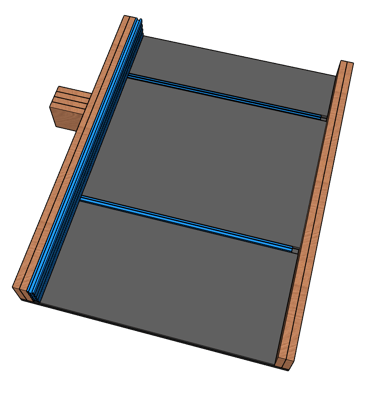
Step 1 - On the bottom of the base, pre-drill using a counter sink bit for the cross pieces. Counter sinking is important so the screws don't scrape your nice table saw top. Then attach the cross pieces from beneath using at least 1-5/8" wood/construction screws. Get these right up to and flush with the edge of the base. Don't worry too much yet about square, but by doing this and the previous step of aligning the base with the fence, you will be pretty close already.
Step 2 - Attach the top layers. You have 2 options. You can glue or you can screw. If gluing, make sure to put a lot of pressure on top to keep it flat while it dries. If screwing, countersink your screws. A benefit of screws is that if you decide to add a dado later and cut through the sled, you can cut another middle piece and replace it later. Don't forget to use the T-Tracks for spacing.
Step 3 - Attach the Guard Block using at least 2-1/2" long screws. Put 4 screws through the cross piece into the guard block at each corner. Of course, make sure its in line with the blade. Note: if you want to paint, now is the time.
Step 4 - Attach the T-Tracks. You will need to cut some more strips like the runners because the T-Tracks will be lower than the top layer. The height of the strips will depend on the thickness you chose for the top layer. Glue these down and then attach the T-Tracks with the included screws.
Step 5 - Attach the multi-track.
Time for truth. Raise your saw blade to about 4"-5". Position your sled onto the table saw track and start it up. Run the sled through the saw, making your first cut into the sled. Don't worry about the multi-track. It will cut through no problem. Obviously, don't push all the way through the guard. Stop once the peak of the blade cuts the multi-track.
To square it up, cut a long scrap piece using the sled. Flip it over and line it up to the cut line. If its off, shim the multi-track on whichever side needs it. Keep adjusting it until your happy with it.
Make your Cut

info@mancavegarageworkshop.com
ManCave Garage Workshop
Florida
United States


@ 2023 ManCave Garage Workshop
