

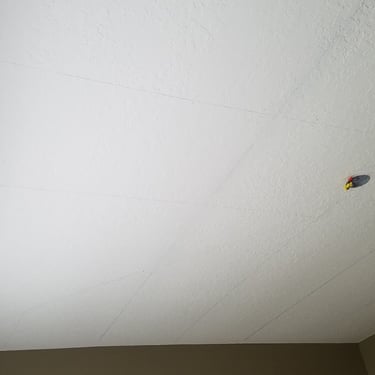
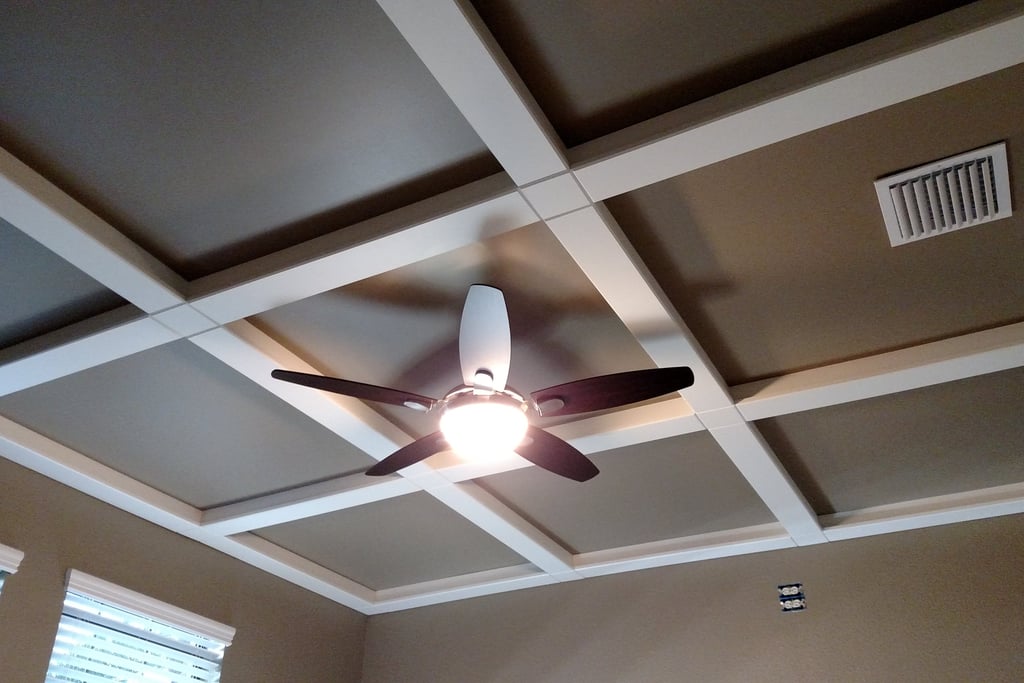
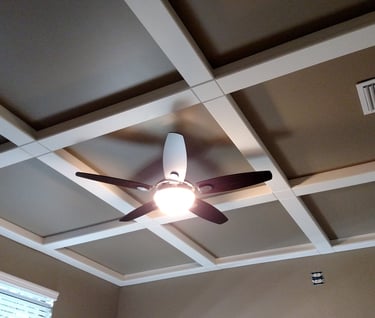
Ceiling
Coffered Ceiling
Putting up my own coffered ceiling in my office
LARGE PROJECTSHOME IMPROVEMENTS
I gave my office a makeover and the first thing I tackled was the ceiling. I always loved the look of coffered ceilings and thought it would be a great project. I started by putting the layout on paper. I measured the room and made a nice grid pattern. Of course, to my shock and dismay, the ceiling fan was NOT in the dead center of the room.
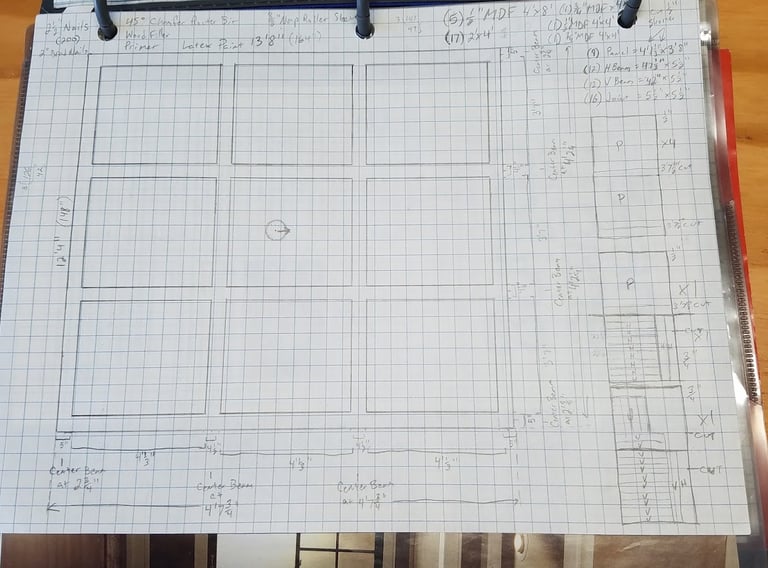

The ceiling isn't level and the walls aren't square so what I thought would take one day, actually took almost 3.
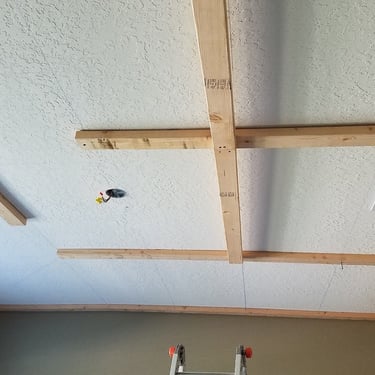
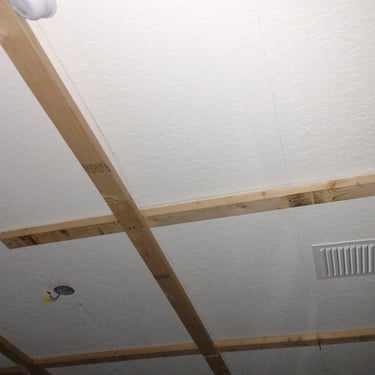
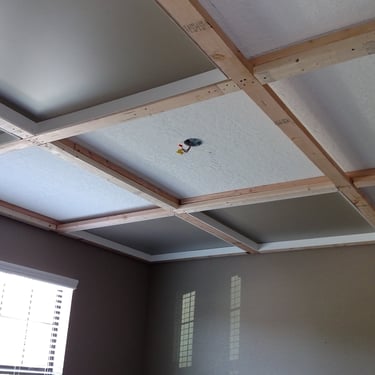
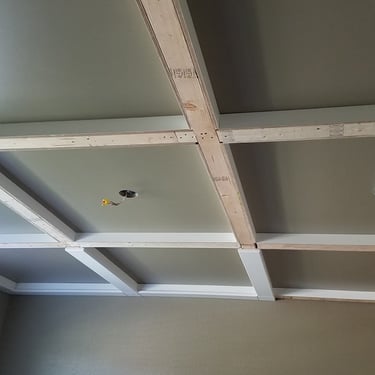
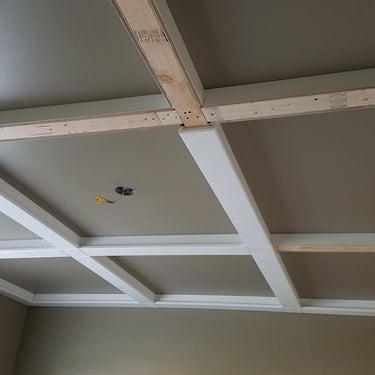
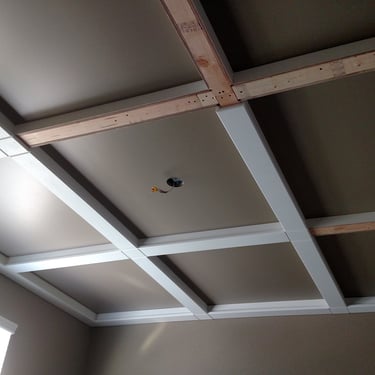
To start, I got out my stud finder and located all of the ceiling joists, using chalk lines to create the grid on the ceiling. I live in Florida and have a newer home with a hurricane roof shaped like a pyramid. Since this room is in the corner of the house, I actually have joists running in two different directions. This caused me to use a few more 2x4's than planned.
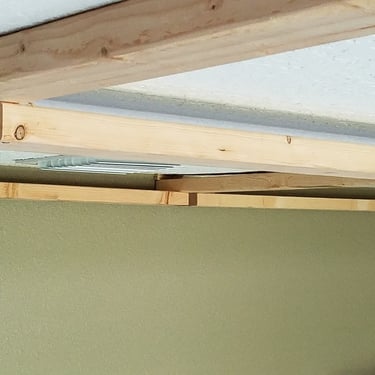
I had to find the low spot in the ceiling and use that as the height all the way around. I used spacers to keep everything level.
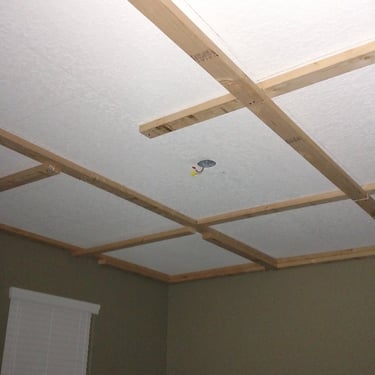
The ceiling fan not being centered in the room is more noticeable now with the grid up. It needed to be moved about 6 inches.
I had some spaces also appear along the outer edges of the grid as the walls are not straight.
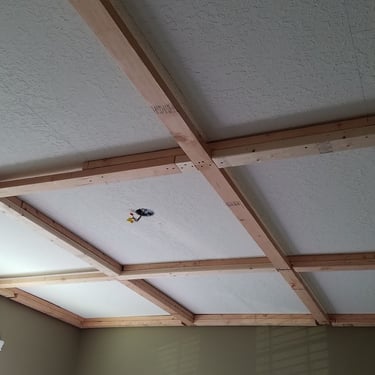
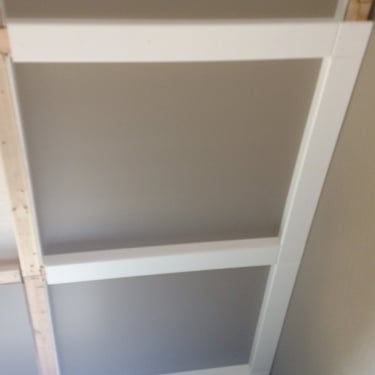
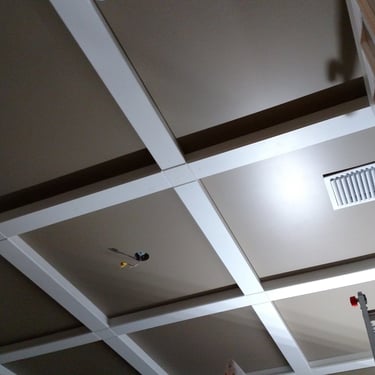
Framing
Paneling
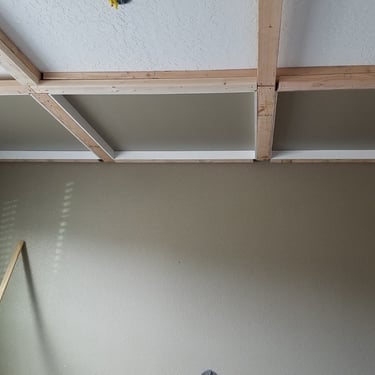
The sections are about 49-3/4" x 44". Thankfully the full sheets of 1/2" MDF are oversized by 1 inch. So accounting for the half inch side panels on each side I have about a quarter of an inch overlap on the longer sides. Not much but enough. We painted the large panels on the ground before putting them up. The side panels were primed on the ground and painted after they were put up.
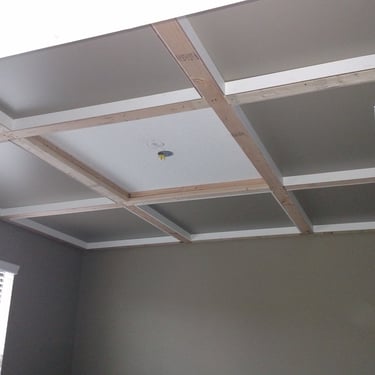
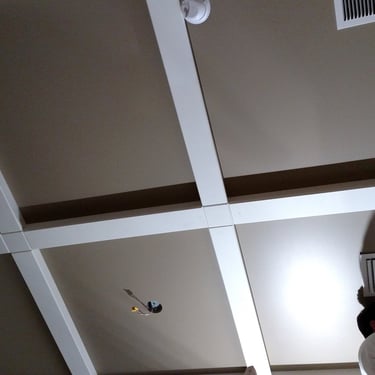
Since the ceiling isn't flat and I couldn't exactly nail them to the ceiling, I decided to float the ceiling panels on the side panels. Not sure of the long term implications of that decision but I really had no choice due to the very uneven ceiling. There is literally a 2 inch difference from one corner of the room to the other not to mention that it is actually wavy. For installation, I put up two opposing side panels using 1" brad nails and then lifted the panel up and slid it over one edge. There was enough room to slide it in one end and then slide it over to sit on both edges. Then I put up the two additional side panels.
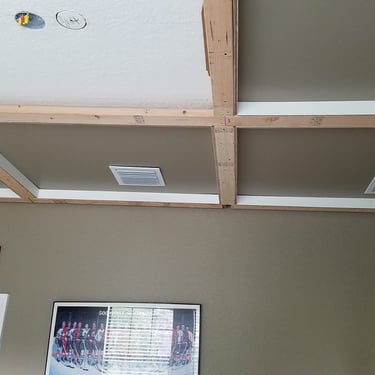
Then there were the vents and ceiling fan to deal with. Unbelievably, after careful measurements and cutting, the panels to fit perfectly the first time. I would have bet against myself on that one.
I also moved the ceiling fan electrical box over to be in the center of the grid.
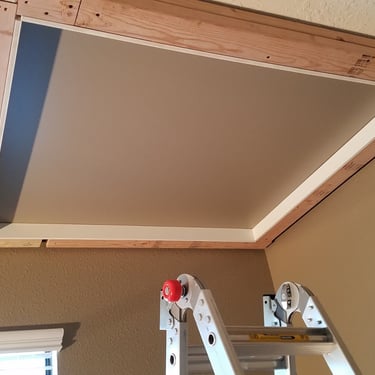

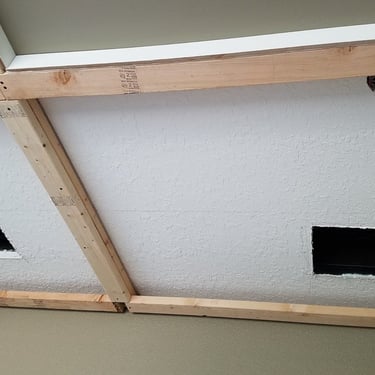

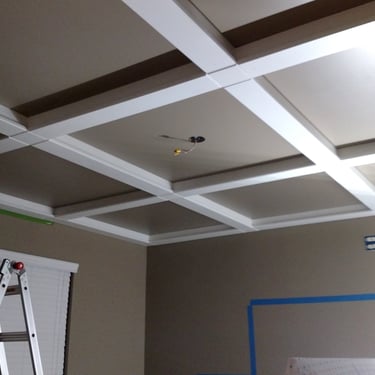
These had to be precise cuts. Each cap had to be the exact length and they are all 5" wide. No sloppiness allowed here. This made it very time consuming and very messy. First I cut the 5" panels from a 4'x8' sheet and the cut them down to size. The caps for the intersections are 5"x5". I used a 45 degree angles router bit to chamfer the edges. This hides the imperfections, especially along the edges of the wall where they are not even.
Capping
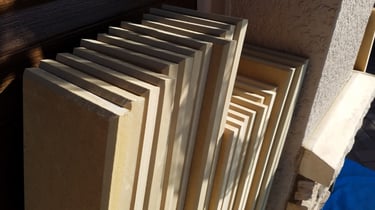
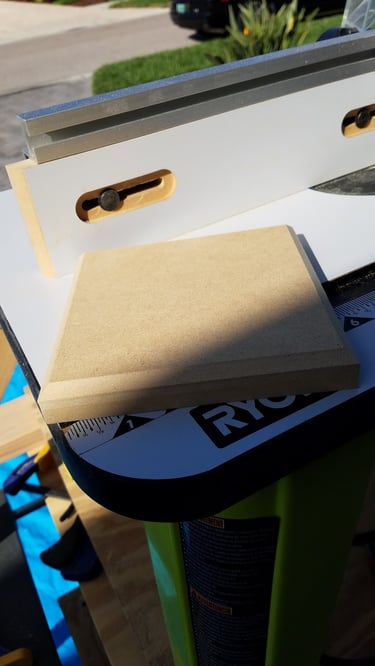
These had to be precise cuts. Each cap had to be the exact length and they are all 5" wide. No sloppiness allowed here. This made it very time consuming and very messy. First I cut the 5" panels from a 4'x8' sheet and the cut them down to size. The caps for the intersections are 5"x5". I used a 45 degree angle router bit to chamfer the edges at a 1/4" depth. This hides the imperfections, especially along the edges of the wall where they are not even.
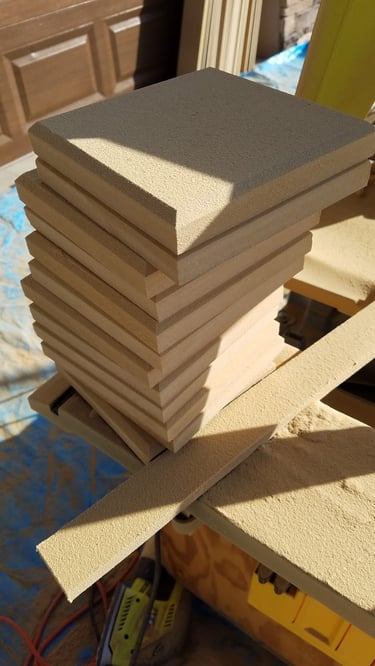
I started the caps in one corner of the room and worked my way to the opposite corner. I used 1-1/2" brad nails to put them up. They were all primed on the ground and painted after we got them up.

Completion
The ceiling came out fantastic. I couldn't be happier with it.
Check out the video that walks through the build out

info@mancavegarageworkshop.com
ManCave Garage Workshop
Florida
United States


@ 2023 ManCave Garage Workshop